anubis
Mod Maker
- Joined
- Feb 22, 2014
- Messages
- 49
About These Pipes
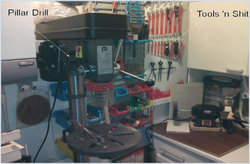
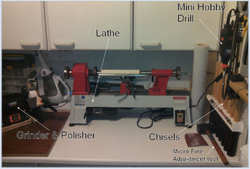
This project started near the end of 2013 after I bought a pipe and thought "I can make one of those". So, I hit the drawing board (CorelDraw) and designed this creation. This turned out to be one of the biggest projects I have ever done because before I could start, I had to turn my shed into a workshop. My old Back&Decker drill with stand just wasn't up to the task as I had found out when I made my first e-cig stand using the afore mentioned drill for drilling and wood turning. So, slowly I started to collect the right tools to do the job, ebay was a godsend. But it meant that I had to spend most of my time waiting in for the postman or courier to deliver either the next piece for the pipe or the next tool to make the next piece of the pipe. Every step forward was between 1 and 10 steps backwoods. The list of tools I bought was phenomenal and the parts that made up the pipe are truly amazing. Things like jewellery, ear stretchers and dolls house door knobs and the places I bought them from...thank God for the internet because I had stuff delivered from America, China, Hong Kong, Singapore, Europe, Australia, India and the UK. I've had to learn how to turn wood on a lathe (and acrylic), how to polish acrylic, how to sharpen tools, the best way to bend pipe, what type of paints to use, how to use an airbrush and design and build some of the tools I used to build this creation. I also had to use lateral thinking to solve a lot of the problems (or thinking around corners as I like to call it)
How it was built.
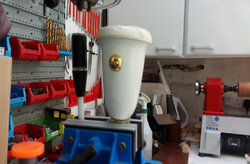
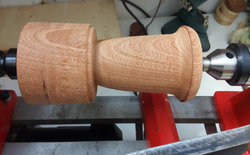
Firstly, a large square piece of wood was put onto the lathe. This was turned into a round piece of wood (approx 75mm in diameter) and a shed load of sawdust. I then started to turn this into a bell shaped pipe bowl with a 50mm cut out at the top (for the battery container and lid). I then measured the Indian bangle I had bought to go around the top and turned the top of the bowl to the same diameter. The top part was rounded and a small groove was cut just below this to take the bangle. Next, a hole was drilled a half inch off centre (to take the wires) then a one inch hole was drilled at the centre (to take the battery) so I ended up with a one inch hole with a groove running down one side. At the other end, a 8.5mm hole was drilled to take the copper pipe. A 12mm hole was drilled into the side for the switch making sure that it was cut to meet the inside groove. Next, a one inch diameter perspex tube was thinned down on the lathe so that it slid nicely into the hole in the pipe bowl, a groove was cut around the top to take one of the wires. Then came the copper pipe. I found the best way to bend this was to cover one end and fill it with salt, tamp it down, refill then cover the other end, then using an external bending spring, I bent it around a round piece of wood that had been cut to the right diameter (filling it with salt prevents the pipe from collapsing). The pipe is then cut to size and polished. Depending on which pipe I am making, the copper is either varnished or painted with undercoat and top coat whereas the bowl has the top part under-coated then top coated with white paint while the rest of the bowl is either stained and varnished or painted. Once this has been done the Indian bangle, the switch with two wires already soldered and the brass bottom cap can be glued into place. The two wires are put into the inside groove (one wire going through the bottom hole and the other coming out of the top. The perspex tube is then put in which covers the wires. The top wire is fed around the groove in the top of the perspex then a one inch steel washer with a 19mm hole in it is pushed down onto the wire and pinned in to place. A second piece of wire is soldered to a small battery spring and then glued to a 19mm rubber washer. The wire and washer is pushed down the perspex tube to the bottom making sure that the wire goes through the bottom hole. So now we have a finished bowl with two wires hanging out the bottom. These wires are then fed through the copper pipe and the pipe in glued into the bottom of the bowl. Now comes the acrylic work. A cone shaped collet has to be made to fit over the pipe (to accept the 510 socket and the metal spacer with air holes) also another cone shaped collet is needed for the pipe stem (mouth piece). I started using 22mm ear streachers but found that they were to difficult to work with which was a shame as they polished up a treat, I now use acetal rod which is far easier to turn on a lathe. A plastic drip tip is also reduced in size on the lathe so that it fits into the pipe stem. The collet with spacer is placed over the copper pipe then the wires are cut to size and soldered onto the 510 socket. The socket is glued into the collet and the collet is glued onto the copper pipe. The second collet is glued onto the pipe stem and the drip tip is glued to the inside of the pipe stem. The lid is a 50mm acrylic mirror that has an "Antique Gold Bronze Filigree Flower Wrap 50mm" glued on top with a "Doll house Miniature 1/12th scale Brass Door Knob Handle" glued in the middle. On the original prototype (The BFP) I used a bronze pendant with the same door knob but with a washer stuck inside to stick to the magnetic top which takes me onto the last part. The battery is a 18650 button top one that sits on top off the battery spring (negative side down) on the top I use a one inch rare earth magnet with a hole in the middle. The terminal on a SMOK reusable fuse goes into the hole, the other side sits on top of the positive pole of the battery and the magnet sticks to the one inch steel washer with a 19mm hole in it. And there you have it....simples!!
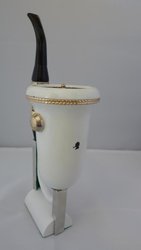
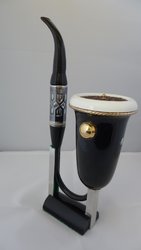
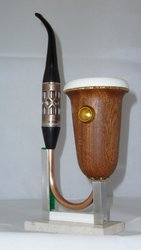
These are a few of the pipes I have made so far. I am in the process of creating a website called "The Steampipe Emporium" at THE STEAMPIPE EMPORIUM - Makers of extrordinary electronic pipes
Some of the prototypes are going to be sold off on eBay in the near future (once I get my shit together) and will be advertised on the website with links to eBay. So, if you are interested in a steampunk pipe check out the website.
Last edited:


