What's new

Aleader X-Drip Resin Squonk Mod

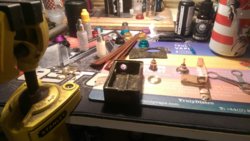
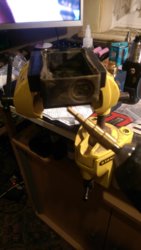
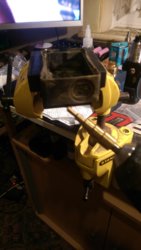
I made a start modifying one of my boxes last night. Nearly done, but not without a couple of hiccups. I'll post some pics when I'm done, assuming I'm successful.
 
I have just posted this to my FB.

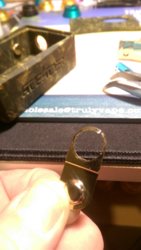
"Anyone with the Aleader X-drip BF Box Mod, watch as the button and fastener will create a hard short with the sleeve of your RDA that is on top of it, Don't put it in a pockets with anything metal.
How hard is it for manufacturers to make sure that there is no way of creating a hard short with their Mech Mods, I had it fixed withing 5 mins.
Watch my Vlog next week for a fix for it.
Please share this around your friends that may have/getting one."

couldnt you not just post this "fix" sooner if its a safety issue? I would of thought a potential safety hazard should sorted asap, not having to watch your vlog next week to find out

just a thought
 
Last edited:
I have used a battery sleeve on the plate from the negative up to the button, at the bottle part and shrinked it, then put a hole in it for the fastener to get through.
I may do a video of it if I have time tomorrow and enough power in the camcorder.
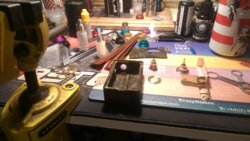
 
I have used a battery sleeve on the plate from the negative up to the button, at the bottle part and shrinked it, then put a hole in it for the fastener to get through.
I may do a video of it if I have time tomorrow and enough power in the camcorder.

nice one, may be able to help prevent some possible accidents
 
Editing a video just now, had some power in battery to record it.
Will post it after finished editing it.
 
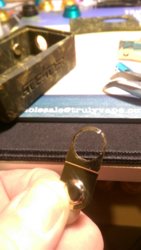
Thanks for confirming that @EatMaBB While I only ever carry mine in a belt pouch, I must admit that extra screw was causing me some concern. I'm currently butchering one of mine, and will now look to do away with the fastener altogether, leaving me with a hole to fill.
 
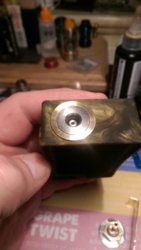
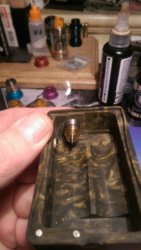
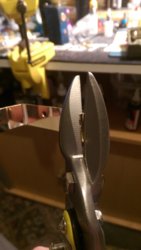
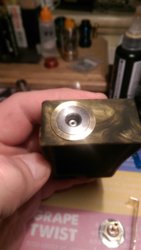
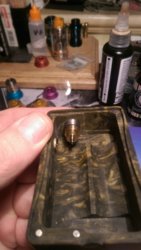
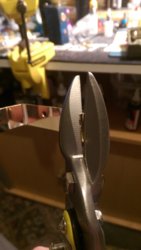
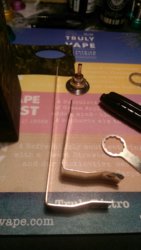
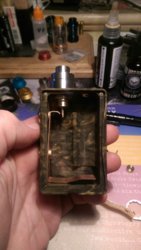
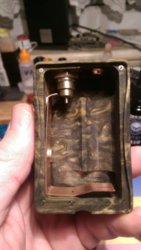
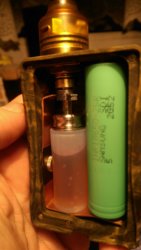
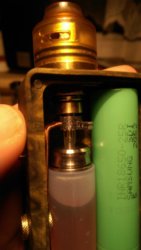
Well it's about done. Working on a small untidy desk in my man cave, I think I've improved the mod, seems to hit a little better, and I've made it a little safer too. Managed to enlarge the 510 hole without a hitch (using a stepped drill bit), and the brass MM washer fits a treat too. New copper connector from the battery to the switch, but I've stuck with the original top connector until I get some wider strips of copper (or a sheet}. I managed to split the ring of the top connector while drilling it out, but it'll do for now. I've added a couple of strips of insulating tape, as per the @EatMaBB recommendation, though I need to dig out my meter to test it (if it still works). I've even managed to add a 3D printed widget on the 510 positive nut, which allows me to swivel it to block any connection should the button be pressed in transit.

I'd love to have used silver, but as a learner the expense was a bit excessive, but maybe one day. This is after all a cheap resin box, but personally I think the chassis is solid and nice looking, and worth the effort. I have another X Drip box to work on, hopefully learning from the few mistakes I made, also with a view to doing away with the retaining screw for the connector. So far not a dribble from the MM 510, which was why I undertook this in the first place. The original juice tube is a little wider than the stuff Mod Maker require, but I've managed to insert a piece of smaller tube into the larger one to reduce the bore, so I can still use the provided bottles if I want.

I'm certainly no craftsman, just a happy "bodge it and scarper" hobbyist, who got it right for a change.
 

Attachments

  • IMAG1029.jpg
    IMAG1029.jpg
    2.4 MB · Views: 254
  • IMAG1030.jpg
    IMAG1030.jpg
    1.9 MB · Views: 254
  • IMAG1031.jpg
    IMAG1031.jpg
    925 KB · Views: 243
  • IMAG1032.jpg
    IMAG1032.jpg
    2.2 MB · Views: 280
  • IMAG1033.jpg
    IMAG1033.jpg
    964.5 KB · Views: 268
  • IMAG1034.jpg
    IMAG1034.jpg
    998.1 KB · Views: 263
  • IMAG1029.jpg
    IMAG1029.jpg
    2.4 MB · Views: 275
  • IMAG1030.jpg
    IMAG1030.jpg
    1.9 MB · Views: 258
  • IMAG1031.jpg
    IMAG1031.jpg
    925 KB · Views: 248
  • IMAG1032.jpg
    IMAG1032.jpg
    2.2 MB · Views: 249
  • IMAG1033.jpg
    IMAG1033.jpg
    964.5 KB · Views: 251
  • IMAG1034.jpg
    IMAG1034.jpg
    998.1 KB · Views: 263
  • IMAG1035.jpg
    IMAG1035.jpg
    2.4 MB · Views: 257
  • IMAG1036.jpg
    IMAG1036.jpg
    2.2 MB · Views: 252
  • IMAG1037.jpg
    IMAG1037.jpg
    1.1 MB · Views: 276
  • IMAG1042.jpg
    IMAG1042.jpg
    980.9 KB · Views: 254
  • IMAG1043.jpg
    IMAG1043.jpg
    923.4 KB · Views: 274
Back
Top Bottom