RicModMaker
Vendor
- Joined
- Oct 29, 2013
- Messages
- 3,240
I've been wanting to do this for a while and think the bought ones can be either too big, or the wires are too thin. That and I'm impatient and can't stand waiting for the slow boat from China to come in!
So here it is, my DIY battery holder made by using a tin can lid, a chinese takeaway box lid and a few basic tools.
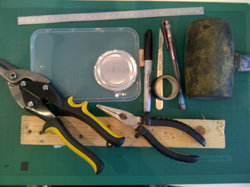
First cut off the lip of the plastic lid so you've got a flat surface to work on.
Then cut 2 sides of it so it's neat and square.
Then mark on the lines using the dimensions in the drawing onto the tin lid and plastic lid.
You'll notice I've done it twice on the tin lid as you'll need one for each end.
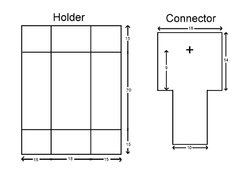
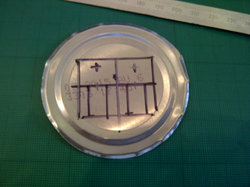
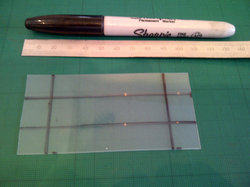
Then use an old biro and scribe the plastic lines against a ruler.
About 5 hard passes is enough to weaken the plastic a little so it'll fold nicely.
Then cut the plastic and cut 2 x 10mm slits for the connectors to poke through.
It should look like this.
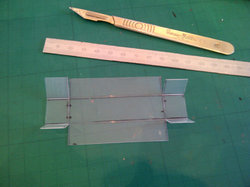
Then fold the flaps inside and use some insulation tape to secure it in place.
Remember to poke your knife through the slits afterwards.
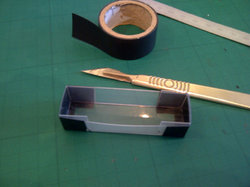
Then take your tin lid, a piece of soft wood like pine, a dowel and a hammer.
I used the pliers to hold the dowel so I didn't bash my fingers.
Place the tin lid on the piece of wood, line up the dowel and bash it a few times until the bulge a sticking out a few millimeters.
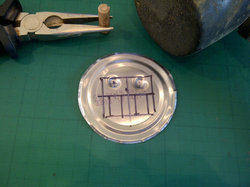
Once this is done, cut it out using the tin snips.
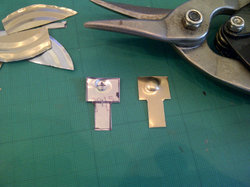
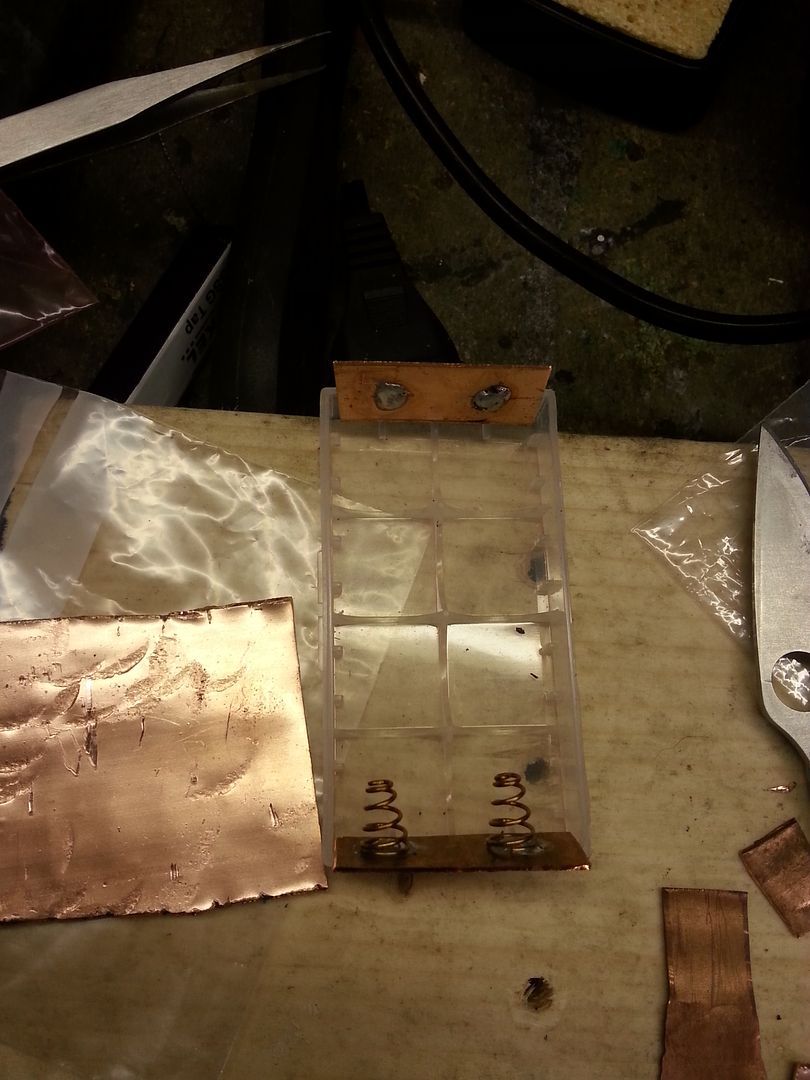
Then poke them through the slits in the holder and fold them. I added an extra 5mm fold to the end before the main fold so it'll be easy to insert a wire before soldering.
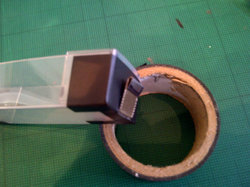
Job done.
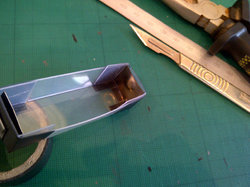
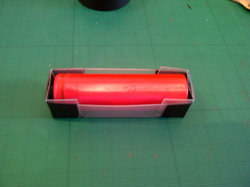
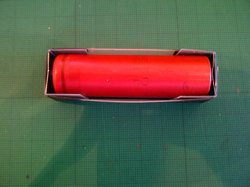
Remember to use some more insulation tape once you've soldered the wires onto the connectors.
So here it is, my DIY battery holder made by using a tin can lid, a chinese takeaway box lid and a few basic tools.

First cut off the lip of the plastic lid so you've got a flat surface to work on.
Then cut 2 sides of it so it's neat and square.
Then mark on the lines using the dimensions in the drawing onto the tin lid and plastic lid.
You'll notice I've done it twice on the tin lid as you'll need one for each end.


Then use an old biro and scribe the plastic lines against a ruler.
About 5 hard passes is enough to weaken the plastic a little so it'll fold nicely.
Then cut the plastic and cut 2 x 10mm slits for the connectors to poke through.
It should look like this.

Then fold the flaps inside and use some insulation tape to secure it in place.
Remember to poke your knife through the slits afterwards.

Then take your tin lid, a piece of soft wood like pine, a dowel and a hammer.
I used the pliers to hold the dowel so I didn't bash my fingers.
Place the tin lid on the piece of wood, line up the dowel and bash it a few times until the bulge a sticking out a few millimeters.

Once this is done, cut it out using the tin snips.

Then poke them through the slits in the holder and fold them. I added an extra 5mm fold to the end before the main fold so it'll be easy to insert a wire before soldering.

Job done.


Remember to use some more insulation tape once you've soldered the wires onto the connectors.
Last edited:


