What's new

New Hana'ish mod

Cheers guys, fitting the illuminating anti-vandal was a bit of a bitch tbh, had to trim the length of it down to accommodate the drop pin of the fat daddy 510. There's not a lot of space in the hana style boxes. Managed to squeeze it in, we'll worth it though,as you said feels lovely compared to them little clicky ones.


Sent from my iPhone using Planet of the Vapes
I don't know how you fit the switch or maybe the ones in my local shop are bigger.
What size hole did you need to drill it out? ones in my local shop are 16mm i'm pretty sure.
I just built a sx350 in a FT hana box and wanted badly to put an illuminating anti vandal switch in but just couldn't physically fit it.
I put a varitube 5\10 connector in it and that ended up being a headache to mount, reckon I would go the Fatdaddy next time too.

P.s. love the bearded dragon in your profile pic, we have them running around in the wild here and are great little insect killers.
 
Last edited:
I don't know how you fit the switch or maybe the ones in my local shop are bigger.
What size hole did you need to drill it out? ones in my local shop are 16mm i'm pretty sure.
I just built a sx350 in a FT hana box and wanted badly to put an illuminating anti vandal switch in but just couldn't physically fit it.
I put a varitube 5\10 connector in it and that ended up being a headache to mount, reckon I would go the Fatdaddy next time too.

P.s. love the bearded dragon in your profile pic, we have them running around in the wild here and are great little insect killers.


The switch I used is 12mm illuminating anti-vandle. So that's a 12mm hole for that one. They are quite long so I had to trim down the switch to accommodate the protruding 510 positive pin in the fat daddy, to avoid it shorting on the switch body. It's a real squeeze to get it all in.

I'm planning on making a new one soon, I will get round to making a little guide when I get a chance, been really busy recently so not had anytime to do it. I will link the switch below for you.

12mm LED Illuminated Vandal Proof Anti Vandal Switch (BLUE)


Thats chuck in my avatar btw, he's a right character. His interests are bugs, basking, bugs and did I mention bugs. I swear he would eat his body weight in locust everyday given half a chance. Beautiful creatures bearded dragons, would love to have animals like that on my doorstep, apart from them big ass nasty spiders, you can keep them


Sent from my iPhone using Planet of the Vapes
Cheers Harry,
Someone was kind enough to send me a PM in regards to the 12mm Anti vandal switch. Here in Aus we don't lack in reptiles, spiders etc but we certainly lack in vape gear and quality accessories. I often browse the UK Mod supply websites but its rare to find one that ships to Aus unfortunately.

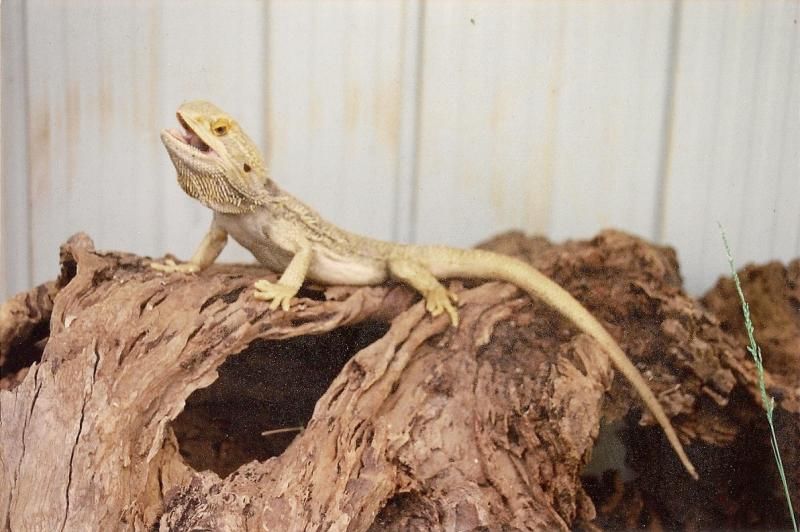
BTW here is a scanned pic of my favourite pet central bearded dragon named Jasper.
He's the dominant male so runs the place in his big outdoor aviary with his 2 females.
Its a bad pic because its scanned to pc from a print.
They have so much personality, gentle with kids, truly just beautiful animals.
scan0001_zpsc70f43bc.jpg

He's a real cracker, not a stress mark in sight, a very happy dragon by the looks of him. I would love to take chuck outside more but we don't get enough hot days here so he gets to cold to fast, bloody Blighty weather. I let him have the run of the house though, bang the central heating up high and away he goes, her indoors goes mad but I insist "he needs his exercise and stimulation".


Sent from my iPhone using Planet of the Vapes
 
Last edited:
Hi! started to do my own build, my first, in the hana diy box, then I found this thread and I have some questions.

1. how did you attach the screen? I thought I'll try with sugru (and to the charging board as well).
2. How did you mod the firing button (i have the same led version), and the wiring for that so the led light up when firing?
3. 12mm hole for the firing and 9mm (tapped with 10x0,5) for the varitube 510, right?
4. for the up/down buttons, does it matter how I wire them? there are no +/- markings on the board (or the tactiles), just up/down

it really is a b*tch to fit the wiring in the case, and I haven't even got to the firing switch and 510 yet (they are on the way from modmaker)


1, I used a very strong double sided tape for the screen, stick it in position and then remove the backing and fold the board over at the ribbon so it sticks to the tape. There are plenty of ways you can do this but I wanted a semipermanent fix in case of issues so It can be removed without damaging anything. Been using mine for a while now and it's all held together quite nicely even after a fairly hefty drop onto the floor. I hot glued the the rest after that, again just in case I had to remove anything.

2, Firstly the led button needs to be shortened to accommodate the 510. There needs to be room for the positive pin which fouls on the switch if not trimmed down. This cant be skipped as the button is in contact with the body of the mod which is the common ground (negative) effectively shorting the circuit. To mod the button to illuminate when fired I built a transistor circuit. This creates another problem as you have to then shoehorn the lot into the mod box, trust me it's not easy to do.

3. 12mm hole for firing button, 9mm hole and 10 x 1 for fat daddy sprung 510. I've not used the varitube one but if you look at the start of the thread somebody had put the drilling threading requirements for that one.

4. One side if the tactile has a + and - leg and so does the other side. It's hard to explain but when you look at them bearing in mind it's a switch you could be forgiven for thinking + and - are opposite to each other but there not. The best thing to do to be sure is to test for continuity with a multimeter across the switch in both open and closed positions and then you will defiantly know which is which. You can snip or carefully snap the other two legs off then to avoid confusion. Obviously with it being a switch it makes no difference which leg is + or - once you've isolated them.

It's important to not confuse + and - of the battery connections/charger chip connections/ and 510 output.

The build your doing is quite a challenging build, not so much technically but just because of the logistics of trying to get it all in to that small box. Not meaning to put you off but there's no shame in simplifying your build a little at least for the first try. Once you've done it once then it really does give you a better idea of what your doing and what you possibly could do.

Good luck with it hope it works out well for you.


Sent from my iPhone using Planet of the Vapes
 
Last edited:
I gave my project a test run without 510 and with temporary switch. everything seems to be working and it says check atomizer of course. so basically i'll have to cut some of the threaded part off from the firing switch? I found some diagrams for it, one of them includes resistor and few jump wires, maybe i'll try that. i have some 470ohm lying around (same kind that modmaker sells) . tell me if i'm wrong, don't want to blow it up :D
if only i could find 12mm vandal proof with short threading that isn't so fat on the front , i could do it without led...

many thanks Harry!
 
Back
Top Bottom